iPhone Setup Guide
-
01
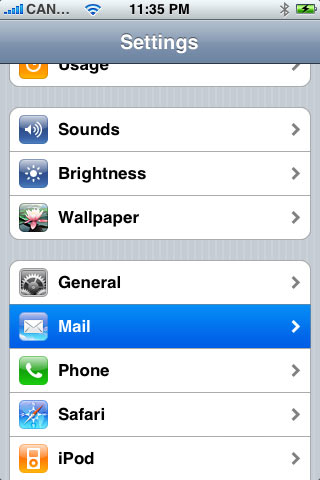
Select "Mail" from the "Settings" menu.
-
02
Select "Add Account" from the "Mail" menu.

-
03
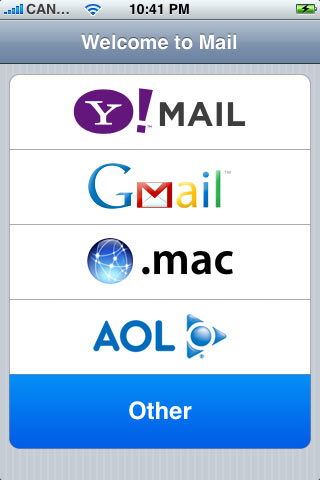
Select "Other".
-
04
Select "POP".

-
05
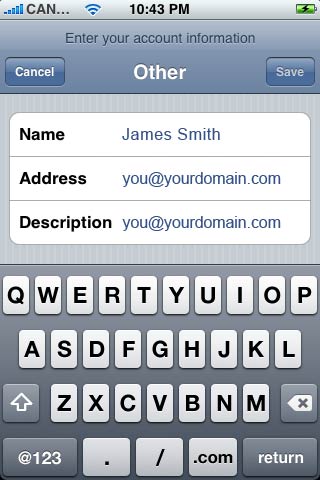
Enter your name in the "Name" field, your full email address (you@yourdomain.com) in the "Address" field and a description for the account in the "Description" field.
-
06
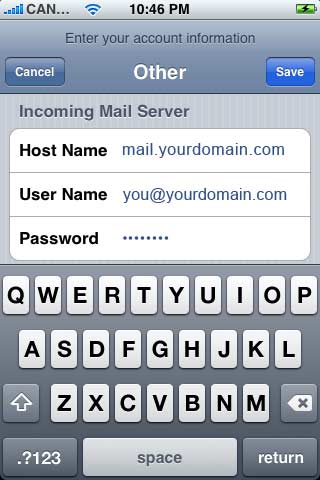
Scroll down and input the settings for your Incoming Mail Server. Enter "mail.yourdomain.com" in the "Host Name" field, replacing "yourdomain.com" with your own domain name. Enter your full email address in the "User Name" field and your password in the "Password" field.
-
07
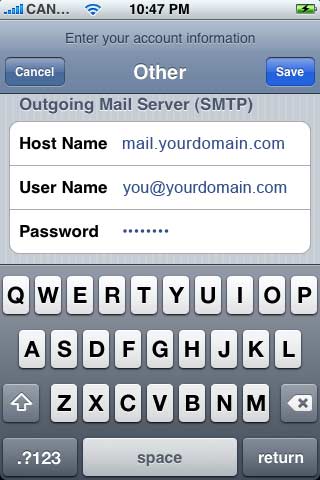
Scroll down and input the settings for the Outgoing Mail Server (SMTP). Enter "mail.yourdomain.com" in the "Host Name" field, replacing "yourdomain.com" with your own domain name. Enter your full email address in the "User Name" field and your password in the "Password" field.Click "Finish". Press the "Save" button in the top right hand side of the screen.
-
08
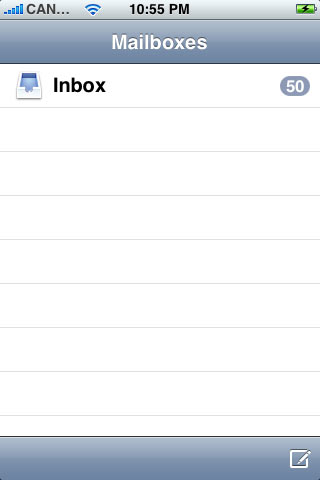
Mail will then check your mail settings. It will verify your settings and add the email account. Now when you press Mail it will take you to your mail account.
-
09
Select "Mail" from the "Settings" menu.
-
10
Select the email account that you have just created.

-
11
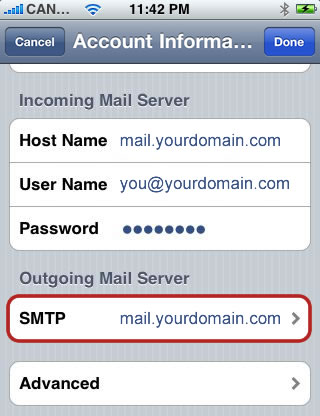
Scroll down and select the Outgoing Mail Server you just created
-
12
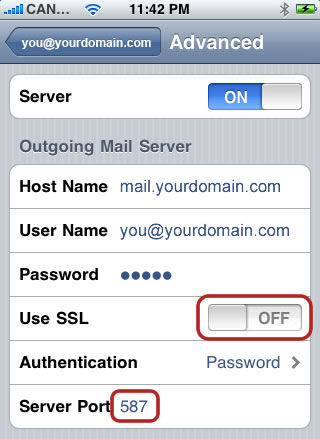
Make sure SSL is off and Server Port is 587
-
13
Go back to the previous screen and press "Advanced".

-
14
Make sure "Use SSL" is turned "OFF" in both "Outgoing Settings" and "Incoming Settings".

-
15
Your set-up is now complete.